How to Do Balasana Correctly: Steps, Benefits & Common Mistakes

How to Do Balasana Correctly: Steps, Benefits & Common Mistakes

Introduction

Are you looking for a simple yet effective yoga pose to relax, relieve stress, and stretch your body? Balasana (Child’s Pose) is one of the best yoga poses for deep relaxation, back pain relief, and mental calmness. Whether you’re a beginner or an advanced yogi, incorporating Balasana yoga pose into your daily practice can do wonders for your flexibility and posture.

In this article, we’ll explore:
✔️ What is Balasana and its benefits
✔️ Step-by-step guide on how to do Balasana correctly
✔️ Common mistakes to avoid in Child’s Pose
✔️ Who should and shouldn’t practice Balasana

If you’re ready to unlock the power of this simple yet effective yoga pose Balasana, keep reading!


What is Balasana? Understanding the Child’s Pose

Balasana (Child’s Pose) is a gentle resting pose that mimics the fetal position. It helps stretch the back, hips, and thighs while promoting relaxation and mindfulness. Often used in yoga sequences as a resting position between more intense poses, Balasana yoga pose benefits both the mind and body.

Balasana in Sanskrit

The word Balasana comes from:

  • “Bala” = Child
  • “Asana” = Pose

That’s why it’s also called Child’s Pose or Baby Pose Yoga.

It is commonly practiced in Hatha, Vinyasa, and Ashtanga yoga as a grounding and restorative posture.


Balasana Benefits: Why You Should Practice This Pose

Balasana yoga is more than just a relaxing yoga pose—it offers multiple physical and mental benefits. Here’s why you should practice it regularly:

1. Stretches the Back and Spine

  • Helps relieve lower back pain
  • Improves spinal flexibility
  • Counteracts the effects of sitting for long hours

2. Relieves Stress & Anxiety

  • Encourages deep breathing and relaxation
  • Calms the nervous system
  • Reduces mental fatigue and emotional tension

3. Enhances Digestion & Reduces Belly Fat

  • Stimulates the abdominal organs
  • Aids digestion and prevents bloating
  • Can contribute to belly fat reduction with regular practice

4. Improves Blood Circulation

  • Increases blood flow to the brain
  • Enhances oxygen supply to the muscles

5. Strengthens the Hips, Knees & Thighs

  • Deeply stretches the hip flexors and thighs
  • Helps with knee mobility and flexibility

6. Good for Prenatal Yoga

7. Balasana for Hair Growth

  • Improves blood circulation to the scalp
  • Can potentially help with hair health

Step-by-Step Guide: How to Do Balasana Correctly

Follow these steps to practice Balasana yoga pose correctly:

1. Start in a Comfortable Position

  • Kneel on the yoga mat with your big toes touching.
  • Sit back on your heels, keeping your spine straight.

2. Fold Forward Gently

  • Inhale deeply, then exhale as you bend forward.
  • Stretch your arms in front of you with palms facing down.

3. Rest Your Forehead on the Mat

  • Keep your forehead touching the ground.
  • Relax your neck, shoulders, and back muscles.

4. Keep Your Breath Steady

  • Breathe slowly and deeply.
  • Feel the stretch in your hips and back.

5. Hold the Pose & Relax

  • Stay in the position for 30 seconds to 1 minute.
  • For deep relaxation, you can stay up to 5 minutes.

Common Mistakes in Balasana & How to Fix Them

Even though Balasana yoga pose is simple, many yogis make mistakes. Avoid these errors to get the most out of your practice:

Arching the Back Too Much → Keep the spine neutral and relaxed.
Placing Too Much Pressure on Knees → If you have knee pain, use a yoga cushion.
Holding the Breath → Focus on deep and rhythmic breathing.
Not Resting the Forehead Properly → Keep your head supported to prevent neck strain.


Balasana Variations for Different Needs

If you find Child’s Pose (Balasana yoga) challenging or want to modify it, try these variations:

1. Extended Child’s Pose (Utthita Balasana yoga)

  • Stretch arms forward for a deeper spine stretch.
  • Helps release tension in the upper back and shoulders.

2. Wide-Knee Child’s Pose

  • Spread knees apart for a deeper hip stretch.
  • Commonly used in prenatal yoga.

3. Supported Child’s Pose

  • Place a bolster or folded blanket under the torso for extra support.
  • Ideal for those with knee pain or lower back issues.

4. Ananda Balasana (Happy Baby Pose)

  • A variation where you hold your feet while lying on your back.
  • Great for hip flexibility and relaxation.

Balasana Contraindications: Who Should Avoid It?

Balasana yoga is safe for most people, but it’s not recommended if you have:

🚫 Knee Injuries → Avoid if you have severe knee pain or recent surgery.
🚫 Pregnancy (Late Stage) → Use modifications to avoid pressure on the belly.
🚫 Severe Lower Back Pain → Consult a yoga teacher before practicing.
🚫 High Blood Pressure or Vertigo → Avoid if it causes dizziness.

If you have any health conditions, consult an expert at the Best Yoga School in Rishikesh for guidance.


How to Include Balasana in Your Yoga Routine

Balasana is a great resting pose and can be included:

At the beginning of your practice → Helps calm the mind.
Between challenging poses → Acts as a recovery pose.
At the end of your practice → Helps in deep relaxation before meditation.

If you’re looking to improve your yoga practice, consider a 200 Hour Yoga Teacher Training in Rishikesh to deepen your knowledge.


FAQs About Balasana (Child’s Pose)

1. What is Balasana and its benefits?

Balasana, or Child’s Pose, is a restorative yoga pose that stretches the back, relieves stress, and promotes relaxation. It helps with flexibility, digestion, and mental clarity.

2. How to do Balasana correctly?

Start in a kneeling position, sit back on your heels, and fold forward with your forehead resting on the mat. Stretch your arms forward and breathe deeply.

3. Is Balasana good for hair?

Yes! Balasana increases blood circulation to the scalp, which may help with hair growth and scalp health.

4. Does Balasana reduce belly fat?

Balasana improves digestion and metabolism, which can contribute to a flatter stomach when combined with a healthy diet.


Final Thoughts: Why You Should Practice Balasana Daily

Whether you’re a beginner or an experienced yogi, Balasana (Child’s Pose) is a must-have in your yoga practice. It relieves stress, improves flexibility, and supports spinal health.

Want to deepen your yoga journey? Join a Yoga Teacher Training Course in Rishikesh at Yogpeeth Rishikesh and transform your practice with expert guidance!

🧘‍♀️ Next Batch Starting Soon! Limited Seats Available! Book Your Spot Today!

Vakrasana in Hatha Yoga: Understanding Vakrasana Benefits & Variations

Vakrasana in Hatha Yoga: Understanding Vakrasana Benefits & Variations

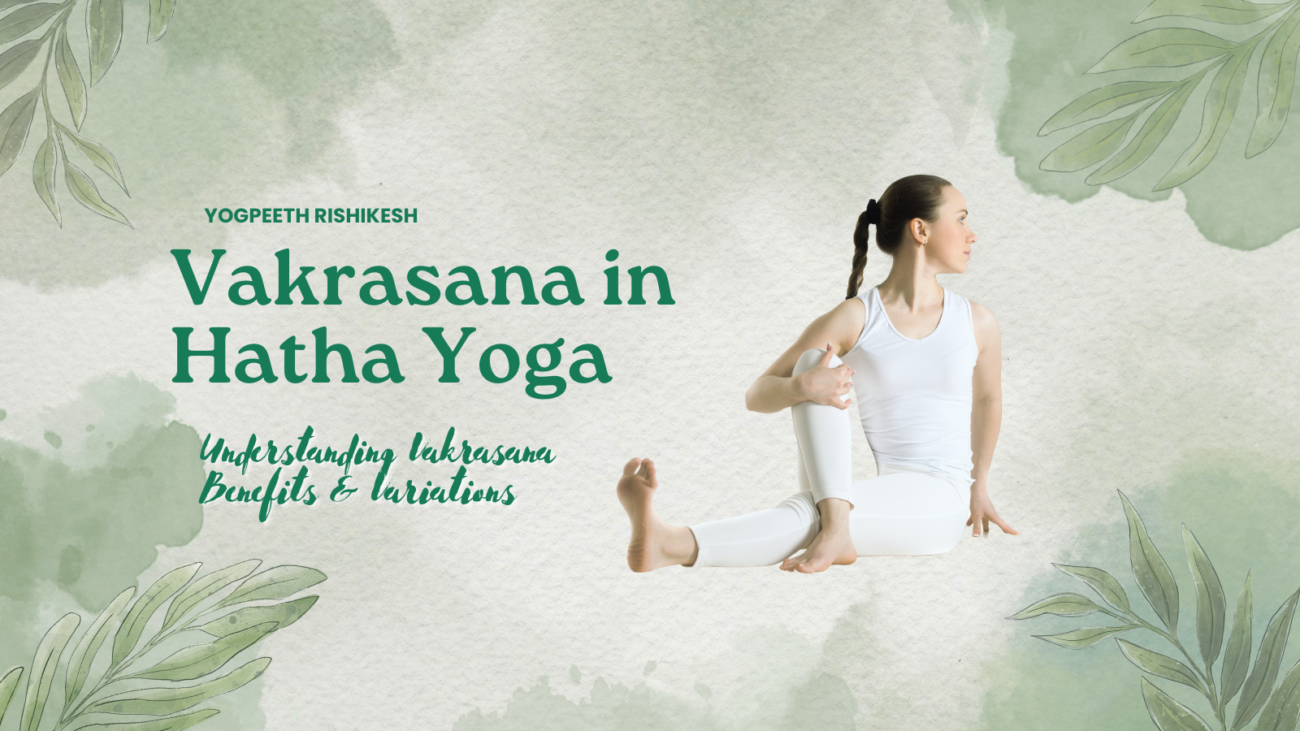
Vakrasana, also known as the Twisting Pose, is a simple yet powerful asana in Hatha Yoga that improves spinal flexibility, digestion, and detoxification. The word Vakrasana is derived from the Sanskrit words Vakra (meaning twist) and Asana (meaning posture). This asana involves twisting the spine, helping to improve posture, boost metabolism, and relieve stress.

In this comprehensive guide, we will explore Vakrasana benefits, its step-by-step procedure, variations, contraindications, and how this pose is incorporated into yoga teacher training courses in Rishikesh.


What is Vakrasana?

Vakrasana, or Twisting Pose, is a seated spinal twist widely practiced in Hatha Yoga. It is one of the fundamental seated asanas that enhances spinal flexibility and stimulates the abdominal organs. Many variations of Vakrasana, such as Kati Vakrasana, Uttana Vakrasana, Supta Vakrasana, and Ardha Vakrasana, offer unique benefits to practitioners.

Vakrasana is commonly taught in 200-hour yoga teacher training courses in Rishikesh, as it is an essential pose for detoxifying the body and improving digestion.


Vakrasana Meaning & Introduction

The Vakrasana meaning comes from the word “Vakra,” meaning twist or bend. This asana is an excellent way to stretch and strengthen the spine, obliques, and core muscles while promoting better digestion and circulation.

Vakrasana Introduction in Hatha Yoga

Vakrasana is part of Hatha Yoga and is included in many yoga schools’ curriculum in Rishikesh. This asana:

  • Enhances spinal mobility and flexibility
  • Aids in digestion by stimulating abdominal organs
  • Reduces stress and improves breathing capacity
  • Strengthens back and core muscles

Vakrasana Steps: How to Perform Vakrasana Correctly

Step 1: Initial Position

  • Sit on the floor with legs extended forward and keep your back straight.

Step 2: Bend the Right Leg

  • Bend your right leg at the knee and place your right foot beside your left knee.
  • Keep your left leg straight.

Step 3: Twist the Spine

  • Inhale deeply, place your left hand on your right knee, and twist your torso towards the right.
  • Place your right hand behind your back for support.

Step 4: Hold & Breathe

  • Maintain the position for 20-30 seconds, breathing deeply.
  • Feel the spinal twist and the stretch in your obliques and back muscles.

Step 5: Repeat on the Other Side

  • Slowly release the twist, return to the starting position, and repeat on the left side.

Vakrasana Images & Drawing

If you’re new to this asana, referring to Vakrasana images or Vakrasana drawings can help with proper alignment.


Vakrasana Benefits: Why You Should Include It in Your Routine

Practicing Vakrasana yoga regularly provides numerous physical and mental health benefits:

1. Improves Spinal Flexibility & Posture

  • Vakrasana stretches and strengthens the spine, reducing stiffness and back pain.
  • Helps correct postural misalignment and relieves pressure from the lower back.

2. Enhances Digestion & Detoxification

  • The twisting motion stimulates the abdominal organs, aiding digestion and relieving constipation.
  • Promotes the elimination of toxins from the body.

3. Strengthens Core Muscles

  • Engages the obliques, abdominal muscles, and lower back, improving core strength and stability.

4. Improves Breathing & Lung Capacity

  • The twisting action expands the ribcage, improving lung function and respiratory health.

5. Reduces Stress & Enhances Mental Clarity

  • Vakrasana stimulates the nervous system, reducing stress, anxiety, and mental fatigue.
  • Helps enhance focus, clarity, and mindfulness.

Vakrasana Variations: Exploring Different Twists

1. Kati Vakrasana (Spinal Twist Pose)

  • Involves lying down and twisting the lower back and pelvis for deep spinal flexibility.

2. Uttana Vakrasana (Extended Spinal Twist)

  • A more advanced variation that enhances oblique stretching and spinal rotation.

3. Supta Vakrasana (Reclined Spinal Twist)

  • A restorative pose performed while lying down, beneficial for lower back pain relief.

4. Ardha Vakrasana (Half Spinal Twist)

  • A simpler variation for beginners that gently stretches the spine and aids digestion.

5. Meru Vakrasana (Advanced Spinal Twist)

  • Involves a deeper twist, improving flexibility and activating the nervous system.

Vakrasana Procedure Benefits and Contraindications

Who Should Avoid Vakrasana?

  • Individuals with severe spinal injuries.
  • People suffering from hernia, ulcers, or recent abdominal surgery.
  • Pregnant women should avoid deep twists.

FAQs About Vakrasana

1. What is Vakrasana and its Benefits?

Vakrasana is a seated spinal twist in Hatha Yoga that improves spinal flexibility, digestion, and mental clarity.

2. Who Cannot Do Vakrasana?

Vakrasana should be avoided by individuals with back injuries, herniated discs, recent abdominal surgery, or pregnancy.

3. Is Vakrasana and Ardha Matsyendrasana Same?

No, Vakrasana is a simpler spinal twist, whereas Ardha Matsyendrasana is a more advanced twist with deeper spinal rotation.

4. What is the Second Name of Vakrasana?

Vakrasana is also called the Seated Spinal Twist Pose in modern yoga.


Incorporating Vakrasana in Yoga Teacher Training in Rishikesh

If you want to deepen your yoga practice, consider enrolling in a 200-hour yoga teacher training course in Rishikesh. Vakrasana is an integral part of yoga teacher training schools in Rishikesh, where students learn its technique, variations, and therapeutic applications.

Best Yoga Schools in Rishikesh Offering Vakrasana Training:

  • Best Yoga School in Rishikesh
  • Yoga Teacher Training School in Rishikesh
  • Sound Healing Yoga Teacher Training

By incorporating Vakrasana into your yoga routine, you can enhance flexibility, improve digestion, and boost mental clarity.

supta vajrasana, vajrasana benefits, does vajrasana reduce belly fat, how to sit in vajrasana, vajrasana yoga, thunderbolt pose, vajrasana steps, vajrasana images

What is Vajrasana and Supta Vajrasana Benefits? How Does Vajrasana Reduce Belly Fat?

Vajrasana, also known as the Thunderbolt Pose or Diamond Pose, is one of the simplest yet most powerful yoga asanas. It is widely practiced in Hatha Yoga and is known for improving digestion, posture, and mental well-being. But can Vajrasana help with belly fat reduction? Let’s explore the supta vajrasana benefits, steps, variations, and precautions, benefits of Vajrasana, the correct way to sit in Vajrasana, and how it contributes to weight loss and belly fat reduction.

What is Vajrasana?

The word “Vajrasana” comes from the Sanskrit words:

  • Vajra (वज्र) – meaning “thunderbolt” or “diamond”
  • Asana (आसन) – meaning “posture” or “pose”

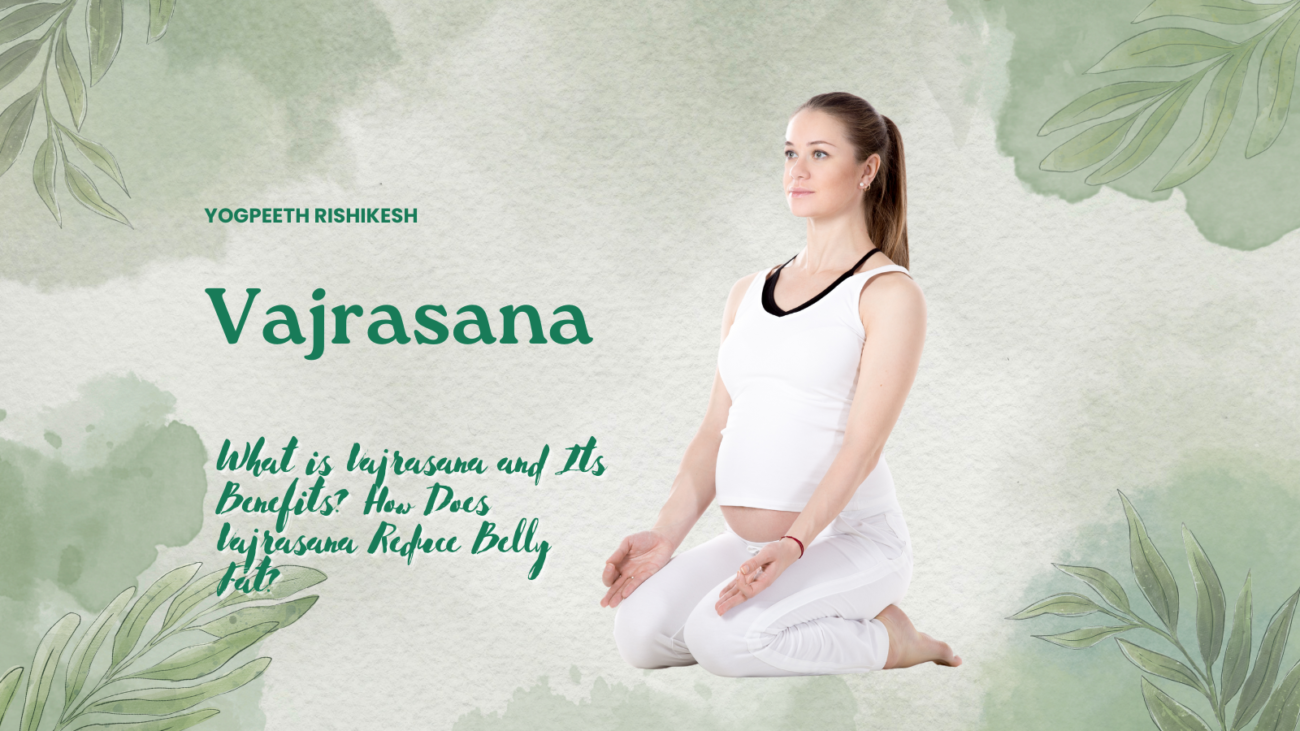
Vajrasana is a kneeling posture that is beneficial for digestion, spine alignment, and meditation. Unlike many other yoga poses, Vajrasana can be practiced immediately after meals, making it a great choice for improving gut health.


How to Sit in Vajrasana (Thunderbolt Pose)?

Vajrasana Steps

  1. Starting Position: Kneel on a yoga mat with your knees together and your feet pointing backward.
  2. Foot Placement: Keep your big toes touching and heels slightly apart.
  3. Lower Your Hips: Sit on your heels, keeping your spine straight.
  4. Hand Placement: Rest your palms on your knees with relaxed shoulders.
  5. Breathe Deeply: Close your eyes, take deep breaths, and hold the posture for 5-10 minutes.

👉 Modification for Beginners: If you feel discomfort in your knees, place a folded blanket under your ankles for support.


Supta Vajrasana: The Advanced Version of Vajrasana

What is Supta Vajrasana?

Supta Vajrasana, or the Reclined Thunderbolt Pose, is an advanced variation of Vajrasana. It involves lying backward while keeping the legs in the Vajrasana position.

Supta Vajrasana Steps

  1. Begin in Vajrasana: Sit in Vajrasana position with a straight spine.
  2. Lean Back: Slowly recline backward, supporting yourself with your elbows.
  3. Lie Down Completely: Bring your head to the floor while keeping your knees and thighs on the mat.
  4. Relax and Breathe: Hold the position for 30 seconds to 1 minute.
  5. Come Back Up: Slowly lift your torso and return to Vajrasana.

Supta Vajrasana Benefits: Why Should You Practice This Pose?

What are the Benefits of Vajrasana?

1. Improves Digestion and Reduces Acidity

  • Unlike other yoga poses, Vajrasana can be done right after meals.
  • It stimulates the digestive organs, reducing gas, bloating, and indigestion.
  • Helps prevent acid reflux and constipation.

2. Helps Reduce Belly Fat

  • Sitting in Vajrasana engages the core muscles and improves digestion, which indirectly aids in fat loss.
  • It enhances metabolism, helping burn excess fat over time.
  • Combine Vajrasana with Supta Vajrasana yoga, and a perfect yoga breakfast for better flexibility and fat reduction.

3. Strengthens the Lower Body

  • Practicing Vajrasana daily improves leg strength, knee flexibility, and ankle stability.
  • Beneficial for people with weak joints or recovering from leg injuries.

4. Enhances Posture and Spine Health

  • Sitting with an aligned spine improves posture.
  • Reduces back pain and strengthens the lower back muscles.
  • Supta Vajrasana (Reclining Thunderbolt Pose) deepens the stretch and improves spinal flexibility.

5. Helps with Meditation and Mental Clarity

  • Vajrasana is a meditative pose that calms the mind and reduces stress.
  • Enhances focus, mindfulness, and emotional stability.
  • Used in Pranayama and breathing exercises for better mental well-being.

6. Boosts Blood Circulation

  • Sitting in Vajrasana improves blood flow to the digestive organs, heart, and brain.
  • Helps regulate blood pressure and enhances energy levels.

7. Reduces Menstrual Discomfort

  • Vajrasana provides relief from menstrual cramps by relaxing the abdominal muscles.
  • Beneficial for hormonal balance and PCOS symptoms.

Supta Vajrasana Benefits

Deepens Spinal Flexibility
✅ Stretches the Chest & Abdomen
✅ Enhances Blood Flow to the Brain
✅ Boosts Digestion & Metabolism
✅ Strengthens Lower Back & Core


Vajrasana and Weight Loss: Does Vajrasana Reduce Belly Fat?

How Vajrasana Helps in Reducing Belly Fat

  1. Boosts Metabolism: Sitting in Vajrasana enhances digestion, which speeds up fat burning.
  2. Tones the Abdominal Muscles: Engaging the core while sitting strengthens the lower belly.
  3. Encourages Mindful Eating: Helps prevent overeating by improving digestion after meals.
  4. Reduces Stress & Emotional Eating: Calms the nervous system and prevents binge eating.

How Long to Hold Vajrasana for Weight Loss?

  • Beginners: 5 minutes daily
  • Advanced: 15-20 minutes post-meal

💡 Pro Tip: Combine Vajrasana with other yoga poses like Supta Vajrasana, Kapalbhati Pranayama, Surya Namaskar and Padmasana for faster belly fat loss.


Vajrasana Variations & Advanced Practices

1. Supta Vajrasana (Reclining Thunderbolt Pose)

  • A more advanced version of Vajrasana, where you recline backward.
  • Helps stretch the spine, improve flexibility, and strengthen the legs.
  • Included in Supta Vajrasana Ashtanga Yoga sequences.

2. Purna Supta Vajrasana (Full Reclined Thunderbolt Pose)

  • A deeper variation that increases hip and knee flexibility.
  • Enhances digestion, breathing, and relaxation.

3. Vajrasana with Pranayama

  • Perform Anulom Vilom (Alternate Nostril Breathing) in Vajrasana for stress relief.
  • Bhastrika and Kapalbhati pranayama aid in fat loss and digestion.

Precautions & Contraindications of Vajrasana

Who Should Avoid Vajrasana?

❌ People with severe knee pain or arthritis.
❌ Individuals with recent ankle, hip, or knee injuries.
❌ Those with spinal disorders or lower back pain should practice with caution.
❌ Pregnant women should consult a yoga instructor before attempting Vajrasana.

Common Mistakes to Avoid

🚫 Slouching your back – Keep your spine straight.
🚫 Keeping knees too far apart – Maintain correct alignment.
🚫 Holding breath – Always breathe deeply and rhythmically.
🚫 Overstretching – Avoid forcing yourself into the pose.


When to Do Vajrasana?

Best Time: Right after meals (5-10 minutes).
Morning Routine: Helps start the day with good digestion and mental clarity.
During Meditation: A perfect pose for mindfulness and breathing exercises.
Before Sleeping: Helps relax the body and promotes better sleep.

Vajrasana vs. Supta Vajrasana: What’s the Difference?

Aspect Vajrasana Supta Vajrasana
Position Sitting upright Reclining backward
Difficulty Beginner-friendly Advanced pose
Primary Benefits Improves digestion, posture Increases flexibility, strengthens back
Precautions Knee issues Spinal and knee injuries

FAQS About Vajrasana

1. How to Sit in Vajrasana?

Sit on your heels with your back straight, knees together, and hands resting on your knees. Breathe deeply and relax.

2. What Are the Benefits of Vajrasana?

Vajrasana improves digestion, posture, and mental focus. It strengthens the legs, spine, and abdominal muscles, promoting overall well-being.

3. Can We Sit in Vajrasana During Pregnancy?

Pregnant women should consult a yoga expert before practicing Vajrasana. If done carefully, it can help improve circulation and digestion during pregnancy.

4. Does Vajrasana Reduce Belly Fat?

Yes! Vajrasana enhances digestion, metabolism, and core strength, which helps in reducing belly fat over time.


Final Thoughts on Vajrasana

Vajrasana is a powerful yoga pose that improves digestion, mental clarity, posture, and flexibility. Whether you’re looking to reduce belly fat, relieve stress, or enhance your meditation practice, Vajrasana is an essential asana to include in your daily routine.

For a deeper yoga experience, consider enrolling in:
Best Yoga Teacher Training in Rishikesh
300 Hour Yoga Teacher Training in Rishikesh
500 Hour Yoga Teacher Training in Rishikesh
200 Hour Yoga Teacher Training Course in Rishikesh

Start your Vajrasana journey today and unlock the numerous health benefits of this incredible yoga posture!


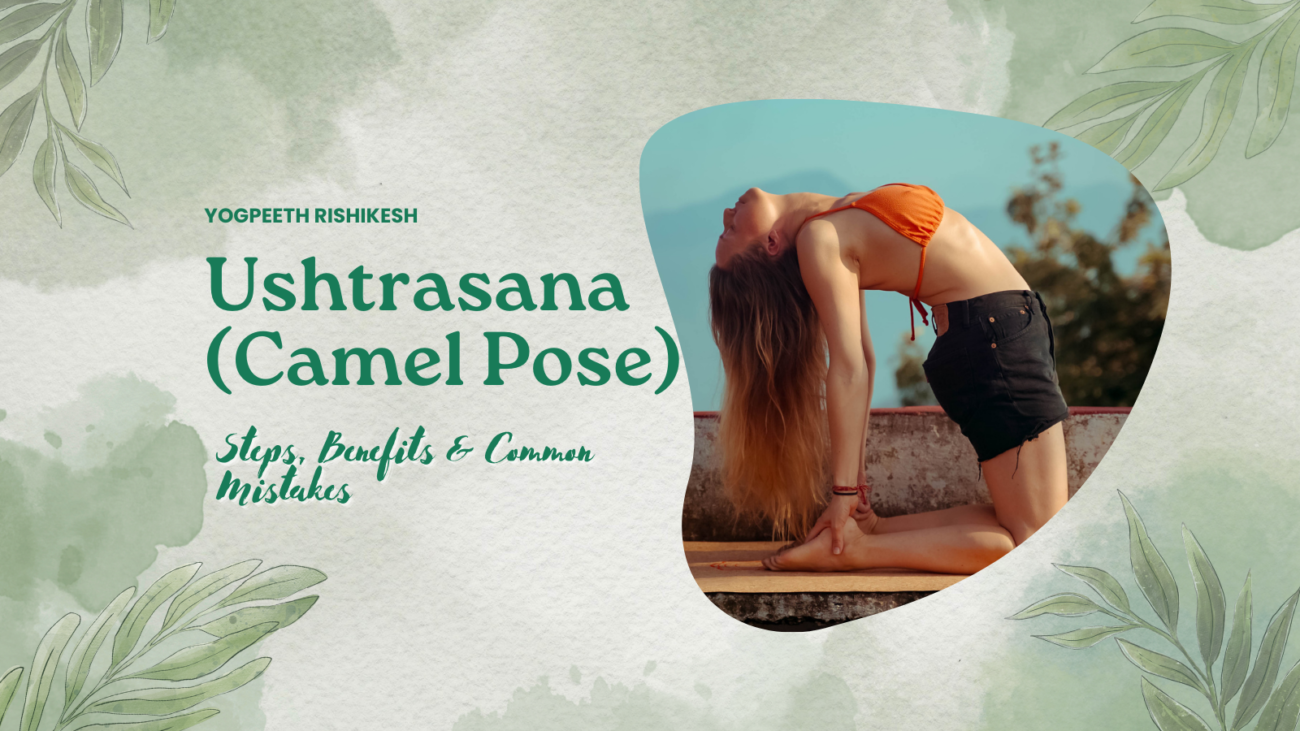
Ushtrasana (Camel Pose): Steps, Benefits & Common Mistakes

Ushtrasana (Camel Pose): Steps, Benefits & Common Mistakes

Ushtrasana, also known as Camel Pose, is a powerful backbend yoga posture that enhances flexibility, strengthens the spine, and opens the chest. This pose is widely practiced in Hatha Yoga and Ashtanga Yoga and is often included in advanced yoga training programs like the 200 Hour Yoga Teacher Training in Rishikesh.

In this guide, we will explore:

  • How to Do Ushtrasana Correctly
  • Top Benefits of Ushtrasana
  • Common Mistakes & How to Avoid Them
  • Precautions and Contraindications

Let’s dive into the procedure of Ushtrasana and learn why this backbend is essential for your yoga practice.


What is Ushtrasana (Camel Pose)?

Ushtrasana (Ustrasana) comes from the Sanskrit words:

  • “Ushtra” meaning camel
  • “Asana” meaning pose or posture

In Camel Pose, the body takes the shape of a camel by arching the spine backward while kneeling. This pose helps in deep spinal extension, stretching the front of the body, strengthening the back, and opening the chest.

Practicing Ushtrasana yoga regularly improves posture, relieves stress, and enhances lung capacity.


How to Do Ushtrasana (Step-by-Step Guide)

Follow these Ushtrasana steps carefully to achieve the perfect Camel Pose.

Step 1: Get into the Starting Position

  • Kneel on the yoga mat with your knees hip-width apart.
  • Keep your thighs perpendicular to the floor.
  • Place your hands on your hips with fingers pointing downward.

Step 2: Engage Your Core & Open the Chest

  • Take a deep inhale and lift your chest upward.
  • Roll your shoulders back and keep your spine long.

Step 3: Lean Back & Reach for Your Heels

  • Exhale and slowly arch your back, reaching for your heels.
  • Keep your hips pushing forward to maintain balance.
  • Rest your palms on your heels with fingers pointing downward.

Step 4: Hold the Pose

  • Keep your head relaxed or gently tilt it back.
  • Breathe deeply and hold the pose for 30 seconds to 1 minute.

Step 5: Release the Pose

  • Inhale and gently bring your hands back to your hips.
  • Slowly lift your chest and return to the starting position.
  • Sit in Child’s Pose (Balasana) to relax the spine.

Modifications & Variations of Ushtrasana

For Beginners – Place your hands on your lower back instead of reaching for your heels.
Advanced Variation – Deepen the stretch by extending one arm overhead while keeping the other hand on the heel.
Supported Ushtrasana – Use yoga blocks under your hands to reduce strain.


Top 6 Benefits of Ushtrasana (Camel Pose)

1. Improves Spine Flexibility & Strength

  • Stretches the entire spinal column, keeping it healthy and mobile.
  • Strengthens the lower back muscles and prevents stiffness.

2. Opens the Chest & Expands Lung Capacity

  • Expands the ribcage, making breathing deeper and more efficient.
  • Helps people suffering from asthma and respiratory issues.

3. Enhances Posture & Relieves Back Pain

  • Corrects slouching posture caused by prolonged sitting.
  • Strengthens the back muscles, reducing pain and tension.

4. Stimulates the Nervous System & Relieves Stress

  • Improves mental clarity and reduces anxiety.
  • Opens the heart chakra, promoting emotional balance.

5. Boosts Digestion & Metabolism

  • Stimulates abdominal organs, improving digestion.
  • Helps in detoxification and weight management.

6. Strengthens the Legs & Core

  • Engages the thighs, glutes, and core muscles for stability.
  • Improves balance and overall body strength.

Common Mistakes in Ushtrasana & How to Fix Them

🚫 Mistake 1: Collapsing the Lower Back
Fix: Engage your core and thighs to support the lower back.

🚫 Mistake 2: Keeping Knees Too Close or Too Wide
Fix: Keep knees hip-width apart for better alignment.

🚫 Mistake 3: Holding the Breath
Fix: Breathe deeply to relax and maintain stability.

🚫 Mistake 4: Dropping the Head Too Far Back
Fix: Keep the neck in a neutral position to avoid strain.


Precautions & Contraindications of Ushtrasana

Who Should Avoid Ushtrasana?

  • People with severe lower back or neck injuries.
  • Those with high blood pressure or vertigo.
  • Pregnant women (opt for gentler backbends).

Best Practices for Safe Ushtrasana

  • Always warm up before attempting deep backbends.
  • Do not force the backbend—progress gradually.
  • Use props like blocks if flexibility is limited.

FAQs About Ushtrasana (Camel Pose)

1. What Are the Benefits of Ushtrasana?

✔ Strengthens the spine, back, and core muscles.
✔ Expands the lungs and improves breathing.
Enhances posture and flexibility.
✔ Reduces stress and anxiety.

2. What Are the Steps for Ushtrasana?

✔ Start by kneeling with knees hip-width apart.
✔ Engage the core and lift the chest upward.
✔ Lean back and reach for your heels.
✔ Hold for 30 seconds, then release slowly.

3. Who Should Not Perform Ustrasana?

✔ Those with severe spinal or neck issues.
✔ People with high blood pressure.
✔ Pregnant women (unless modified by a yoga instructor).

4. Which Diseases Are Cured by Ustrasana?

✔ Helps relieve back pain and spinal stiffness.
✔ Improves digestion and gut health.
✔ Enhances lung function for better breathing.

5. What Are the Disadvantages of Camel Pose?

🚫 Can cause back pain if done incorrectly.
🚫 May lead to neck strain if the head is dropped forcefully.
🚫 Not recommended for people with high blood pressure.


Conclusion: Why You Should Add Ushtrasana to Your Yoga Practice

Ushtrasana (Camel Pose) is an excellent backbend that improves spinal flexibility, posture, and lung capacity. It is a key asana in advanced yoga training programs such as the 200 Hour Yoga Teacher Training in Rishikesh and Top Yoga School in Rishikesh.

By practicing Ushtrasana regularly, avoiding common mistakes, and listening to your body, you can unlock a stronger, more flexible spine and enjoy better mental clarity.

Ready to deepen your yoga practice? Join a certified yoga teacher training course in Rishikesh and take your yoga journey to the next level!

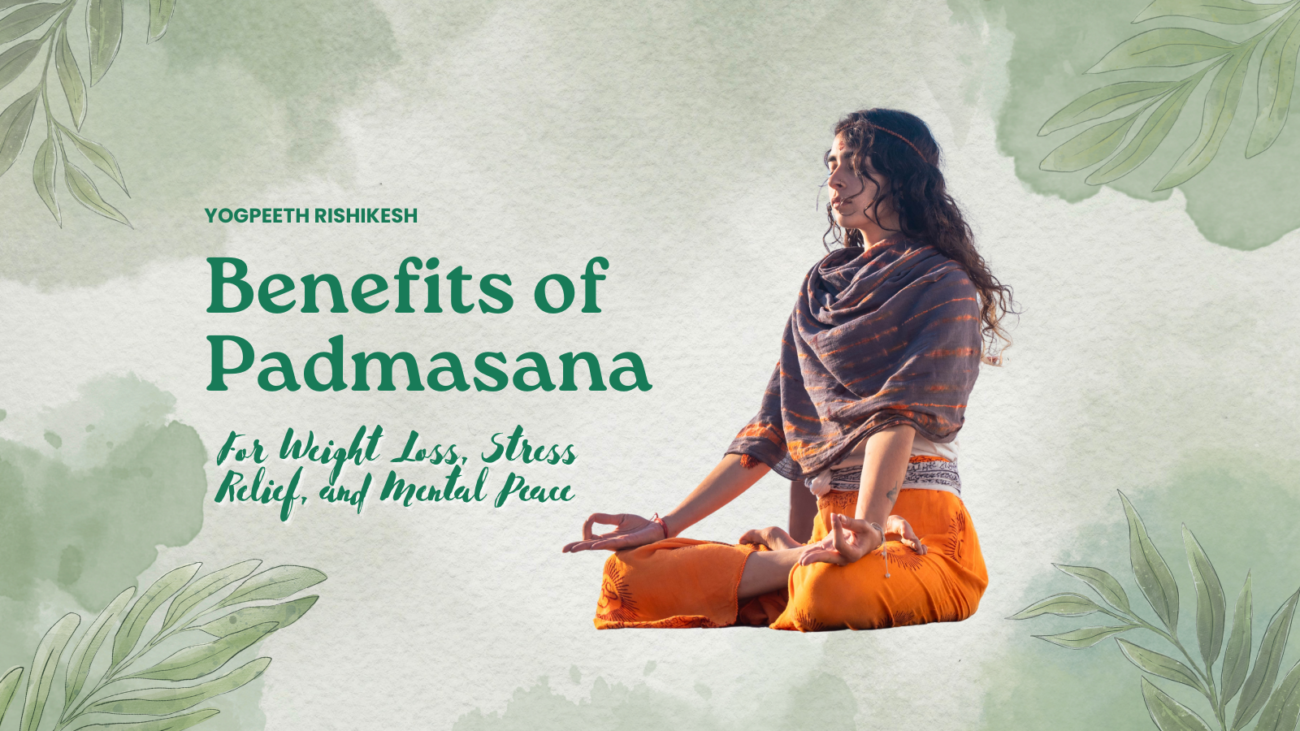
Benefits of Padmasana for Weight Loss, Stress Relief, and Mental Peace

Benefits of Padmasana for Weight Loss, Stress Relief, and Mental Peace

Padmasana, commonly known as the Lotus Pose, is a fundamental sitting posture in yoga and meditation practices. This ancient asana, revered for its profound impact on both the body and mind, has been a cornerstone of spiritual and physical wellness for centuries. In this comprehensive guide, we’ll explore the myriad benefits of Padmasana, from its physical advantages to its mental and spiritual impacts, and provide you with expert insights on how to incorporate this powerful pose into your daily routine.

Quick Benefits Overview

Before we dive deep into the world of Padmasana, here’s a quick snapshot of its key benefits:

  • Improves posture and spinal alignment
  • Enhances flexibility in hips, knees, and ankles
  • Promotes mental calmness and reduces stress
  • Stimulates the root (Muladhara) chakra
  • Aids in digestion and alleviates menstrual discomfort
  • Boosts concentration and meditation practice
  • Strengthens the pelvic floor muscles

Now, let’s explore these benefits in detail and uncover why the Lotus Pose is considered a noble and transformative practice in yoga.

The Physical Benefits of Padmasana

1. Improved Posture and Spinal Alignment

One of the most significant physical benefits of practicing Padmasana regularly is the improvement in posture and spinal alignment. When performed correctly, the Lotus Pose encourages a straight spine, which can help alleviate back pain and prevent future spinal issues.

How it works:

  • The crossed-leg position creates a stable base for the spine
  • The upright torso encourages proper alignment of the vertebrae
  • Regular practice strengthens the back muscles, supporting better posture throughout the day

2. Enhanced Flexibility in Lower Body Joints

Padmasana is an excellent pose for increasing flexibility in the hips, knees, and ankles. This increased flexibility can lead to improved mobility and reduced risk of injury in daily activities.

Key areas of flexibility improvement:

  • Hip joints: The external rotation required in Padmasana helps loosen tight hip flexors
  • Knees: The pose gently stretches the ligaments and tendons around the knee joint
  • Ankles: The crossed-leg position promotes flexibility in the ankle joints

3. Strengthened Core and Pelvic Floor Muscles

While it may not be immediately apparent, maintaining the Lotus Pose engages and strengthens both the core and pelvic floor muscles.

Benefits of strengthened core and pelvic floor:

  • Improved stability and balance
  • Enhanced bladder control
  • Better sexual function
  • Reduced risk of lower back pain

4. Improved Circulation in the Lower Body

The unique positioning of the legs in Padmasana can help improve blood circulation in the lower body, particularly in the pelvis and legs.

Circulatory benefits:

  • Reduced swelling in the feet and ankles
  • Decreased risk of varicose veins
  • Improved overall cardiovascular health

5. Digestive System Support

Sitting in Padmasana can have positive effects on the digestive system by gently massaging the abdominal organs and promoting better digestion.

Digestive benefits:

  • Stimulation of the digestive organs
  • Potential relief from constipation
  • Improved nutrient absorption

Mental and Emotional Benefits of Padmasana

1. Stress Reduction and Relaxation

One of the most celebrated benefits of Padmasana is its ability to induce a state of calm and relaxation. The pose naturally encourages deep, steady breathing, which activates the parasympathetic nervous system – our body’s “rest and digest” mode.

How Padmasana reduces stress:

  • Promotes slow, deep breathing
  • Encourages mindfulness and present-moment awareness
  • Creates a physical foundation for meditation practices

2. Enhanced Concentration and Focus

Regular practice of Padmasana can significantly improve your ability to concentrate and maintain focus. The stable, grounded position of the body in this pose helps to calm the mind and reduce distractions.

Concentration benefits:

  • Improved ability to focus on tasks
  • Enhanced memory retention
  • Greater mental clarity and reduced mental chatter

3. Emotional Balance and Mood Improvement

Practicing Padmasana can have a positive impact on your emotional well-being. The combination of physical posture, breath control, and mental focus can help regulate emotions and improve overall mood.

Emotional benefits:

  • Reduced symptoms of anxiety and depression
  • Increased emotional resilience
  • Greater sense of inner peace and contentment

4. Improved Sleep Quality

While not directly related to sleep, the relaxation and stress-reduction benefits of Padmasana can contribute to improved sleep quality when practiced regularly.

Sleep-related benefits:

  • Easier time falling asleep
  • Reduced nighttime awakenings
  • More restful and rejuvenating sleep

Spiritual Benefits and Chakra Activation

1. Root Chakra (Muladhara) Activation

In yogic philosophy, Padmasana is closely associated with the activation and balancing of the root chakra, or Muladhara. This energy center is located at the base of the spine and is responsible for our sense of security, stability, and connection to the earth.

Effects of root chakra activation:

  • Increased feelings of groundedness and stability
  • Enhanced sense of safety and security
  • Improved connection with one’s physical body

2. Enhanced Meditation Practice

Padmasana is often considered the ideal posture for meditation due to its stability and the alignment it provides for the spine and energy channels.

Benefits for meditation:

  • Stable and comfortable seated position for extended periods
  • Alignment of the spine facilitates the flow of energy
  • Reduced physical distractions allow for deeper focus

3. Spiritual Growth and Self-Awareness

Regular practice of Padmasana, especially when combined with meditation or pranayama (breath control), can foster spiritual growth and increased self-awareness.

Spiritual benefits:

  • Deepened connection to one’s inner self
  • Increased awareness of subtle energies in the body
  • Potential for transcendent or enlightening experiences

How to Perform Padmasana: Step-by-Step Guide

To reap the full benefits of Padmasana, it’s crucial to practice the pose correctly. Here’s a step-by-step guide to help you achieve the perfect Lotus Pose:

  1. Start in a seated position: Begin by sitting on the floor with your legs extended in front of you.
  2. Bend your right knee: Slowly bend your right knee and bring your right foot towards your left hip.
  3. Position your right foot: Place your right foot on top of your left thigh, as close to the hip crease as possible.
  4. Bend your left knee: Now, bend your left knee and bring your left foot towards your right hip.
  5. Position your left foot: Place your left foot on top of your right thigh, mirroring the position of your right foot.
  6. Adjust your posture: Sit up straight, lengthening your spine. Your knees should be resting on the floor.
  7. Place your hands: Rest your hands on your knees, palms facing up or down, or bring them into a mudra of your choice.
  8. Relax and breathe: Close your eyes, relax your face and shoulders, and begin to breathe deeply and steadily.

Important note: If you find the full Lotus Pose challenging or uncomfortable, start with Half Lotus (Ardha Padmasana) or Easy Pose (Sukhasana) and gradually work your way up to full Padmasana.

Variations of Padmasana

1. Ardha Padmasana (Half Lotus Pose)

This variation is an excellent starting point for those working towards full Padmasana.

How to perform:

  • Follow steps 1-3 of the full Padmasana instructions
  • Instead of bringing the left foot up, keep it tucked under the right thigh

2. Baddha Padmasana (Bound Lotus Pose)

This advanced variation adds an upper body component to the traditional Lotus Pose.

How to perform:

  • Start in full Padmasana
  • Reach your arms behind your back
  • Grasp your toes or the opposite foot with each hand

3. Padma Mayurasana (Lotus Peacock Pose)

This challenging variation combines Padmasana with an arm balance.

How to perform:

  • Start in Padmasana
  • Place your hands on the floor beside your hips
  • Lean forward and lift your body off the ground, balancing on your hands

Padmasana Precautions and Padmasana Contraindications

While Padmasana offers numerous benefits, it’s not suitable for everyone. Here are some precautions and contraindications to keep in mind:

Who should avoid Padmasana:

  • People with knee injuries or chronic knee pain
  • Those with recent or chronic ankle injuries
  • Individuals with hip problems or recent hip surgery
  • Pregnant women, especially in the later stages of pregnancy
  • People with sciatica or piriformis syndrome

General precautions:

  • Always warm up before attempting Padmasana
  • Listen to your body and never force yourself into the pose
  • If you experience pain, come out of the pose immediately
  • Practice under the guidance of a qualified yoga instructor, especially when starting out

Comparison with Other Meditation Poses

While Padmasana is often considered the ideal meditation pose, there are other options that may be more suitable depending on your flexibility and comfort level.

Helps in longer meditation sessions
✔ Encourages deep breathing and mindfulness
✔ Balances the nervous system, reducing stress and anxiety

Padmasana vs. Siddhasana (Accomplished Pose)

Aspect Padmasana Siddhasana
Difficulty More challenging Generally easier
Hip Flexibility Required High Moderate
Knee Stress Higher Lower
Energy Flow Believed to be optimal Very good
Stability Excellent Very good

Padmasana vs. Sukhasana (Easy Pose)

Aspect Padmasana Sukhasana
Difficulty More challenging Easy
Hip Flexibility Required High Low
Knee Stress Higher Minimal
Energy Flow Believed to be optimal Good
Stability Excellent Good

Frequently Asked Questions

1. Which disease is cured by Padmasana?

While Padmasana is not a cure for any specific disease, regular practice can help alleviate symptoms and support overall health in various conditions:

  • Lower back pain
  • Mild anxiety and depression
  • Digestive issues
  • Menstrual discomfort
  • High blood pressure (when practiced gently and under supervision)

It’s important to note that Padmasana should be used as a complementary practice alongside conventional medical treatments, not as a replacement.

2. Who cannot do Padmasana?

Padmasana is not recommended for:

  • People with knee injuries or chronic knee pain
  • Those with recent ankle sprains or chronic ankle issues
  • Individuals recovering from hip surgery or with severe hip problems
  • Pregnant women, especially in the later stages of pregnancy
  • People with acute or severe sciatica

Always consult with a healthcare professional or a qualified yoga instructor before starting any new yoga practice, especially if you have pre-existing health conditions.

3. What chakra is Padmasana?

Padmasana is primarily associated with the Root Chakra (Muladhara), located at the base of the spine. This chakra is connected to our sense of security, stability, and grounding. By practicing Padmasana, you can help activate and balance this important energy center.

However, the pose also influences other chakras:

  • Sacral Chakra (Svadhisthana): The hip-opening aspect of the pose can stimulate this chakra
  • Solar Plexus Chakra (Manipura): The upright posture engages the core, potentially activating this chakra
  • Heart Chakra (Anahata): The open chest position in Padmasana can help open this chakra

4. Why is Padmasana called lotus?

Padmasana is called the Lotus Pose because the position of the legs in this asana resembles the petals of a lotus flower. In Sanskrit, “Padma” means lotus, and “asana” means pose or seat.

The lotus flower holds great symbolic significance in many Eastern traditions:

  • It grows in muddy water but rises above the surface to bloom, symbolizing the journey from ignorance to enlightenment
  • The flower opens its petals to the sun, representing the opening of the soul to divine truth
  • Despite its delicate appearance, the lotus is resilient, symbolizing spiritual perseverance

By sitting in Padmasana, practitioners aim to embody these qualities of purity, enlightenment, and spiritual growth.

Conclusion: Embracing the Transformative Power of Padmasana

Padmasana, the Lotus Pose, is more than just a sitting position – it’s a gateway to profound physical, mental, and spiritual benefits. For those seeking to deepen their understanding of yoga, including asanas like Padmasana, yoga teacher training programs in Rishikesh, Uttarakhand, India, offer immersive experiences. From improving posture and flexibility to reducing stress and enhancing meditation, this ancient yoga pose offers a holistic approach to well-being, and is often a core component of yoga teacher training in Rishikesh.

As you incorporate Padmasana into your practice, remember to:

  1. Start slowly and respect your body’s limits
  2. Practice regularly to experience the full range of benefits
  3. Use props or modifications if needed to make the pose more accessible
  4. Combine Padmasana with breathing exercises or meditation for enhanced effects
  5. Consult with a qualified instructor to ensure proper alignment and technique

By embracing the Lotus Pose with patience and dedication, you open yourself to a transformative practice that can enhance your mind, body, and spirit. Whether you’re a seasoned yogi or just beginning your journey, Padmasana offers a path to greater balance, awareness, and inner peace.